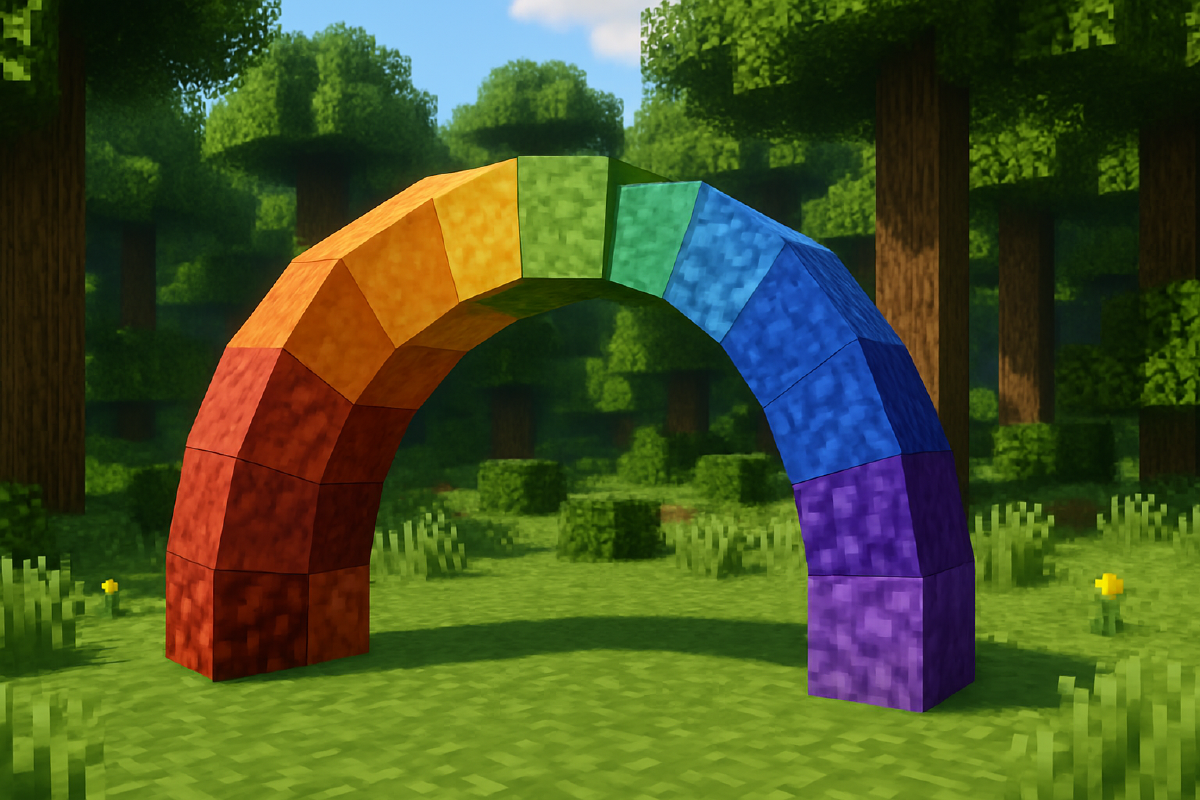

A while back I wrote a popular blog post on how to set up developer self-service for Minecraft using HCP Waypoint as an internal developer portal (IDP).

As part of that blog post and the accompanying GitHub-repository I created structures in the Minecraft world using Terraform. I had Terraform modules for a house, a bridge, various HashiCorp product logos, and a pyramid. To compute the coordinates where to place blocks for these structures I used various techniques - from manually computing them using pen and paper to using nested for-loops in Terraform local values. For the HashiCorp product logos I asked ChatGPT to convert from logo (png) to Minecraft coordinates (with varying results).
In this blog post I want to define these coordinates in a different way.
First a note on coordinates in the Minecraft world:
A block in Minecraft is placed at a coordinate (x,y,z). The horizontal plane is made up of the (x,z) coordinate pair. The y-coordinate is the vertical coordinate, increasing up towards the sky and decreasing down towards the bedrock.
Creating an input language for Minecraft structures#
Ideally, I would like to have an input file where I can define arbitrary 3D structures in a Minecraft world.
Spoiler alert ⚠️ I will not get to that point in this blog post. This needs further thought and work!
The idea would be to have something equivalent to a Terraform configuration file, where I can declaratively define the structure I want to create in Minecraft.
One way of doing this would be to actually use Terraform by developing the Minecraft provider for Terraform further to include new resource types such as a house, a bridge, and so on. This would be an entirely other beast to take on and it is not really what I had in mind right now.
Instead I want to start with a simple approach: creating 2D structures simply by drawing them in a text file.
For example, drawing a series of squares separated by an empty space would look like this:
xxxx  xxxx  xxxx  xxxx
x  x  x  x  x  x  x  x
x  x  x  x  x  x  x  x
xxxx  xxxx  xxxx  xxxx
Drawing a small Terraform logo would look something like this (I used this page to draw it):
xxxx
xxxxxxx
xxxxxxxxxx       xxx
xxxxxxxxxxxxxxxxxxxx
   xxxxxxxxxxxxxxxxx
       xxxxxxxxxxxxx
       xxxxxxxxxx
       xxxxxx
       xxxxxx
       xxxxxx
         xxxx
In the example in the next section I will draw a bigger Terraform logo that looks more like the actual Terraform logo. I used a small version of the logo here just for illustrative purposes.
In the two examples above I use simple x characters to mark where a block should be placed. The absence of a block means that no block should be placed. Each x represents one block at one specific coordinate.
We can take this one step further by allowing different characters to mean different types of blocks. For instance, let’s say we will only use wool blocks for now. We could use a b for a blue wool block, r for a red wool block, y for a yellow wool block, and so on.
As an example, the following would draw a red square, followed by a green square, followed by a blue square:
rrrr  gggg  bbbb
r  r  g  g  b  b
r  r  g  g  b  b
rrrr  gggg  bbbb
This will be my Minecraft input language for Terraform v1.0!
Minecraft input language for Terraform v1.0
In this simple language characters in a 2D layout in a textfile represents blocks of different material in Minecraft.
Each column in the file represents different x-coordinates, and each row in the file represents different y-coordinates.
The 2D structures thus live in the (x,y)-plane with a fixed z-coordinate.
All coordinates are relative to an origin-coordinate that has to be supplied along with the structure to be created.
Implementation#
As in my previous post on Minecraft and Terraform I use the HashiCraft Minecraft provider:
terraform {
  required_providers {
    minecraft = {
      source  = "HashiCraft/minecraft"
      version = "0.1.1"
    }
  }
}

provider "minecraft" {
  address  = var.address
  password = var.password
}
I will not go through the details of how to create a working Minecraft server. Check the post linked above to find instructions and source code for how to do this. You could also run a Minecraft server locally. The important thing is that you configure the provider with the address where your server is running, including the rcon port, and the rcon password for the server. Again, check my other blog post for details on this. You can also check out this great article by Mark Tinderholt.
I will use a local value map to define what type of block to place based on the character used in the input drawing:
locals {
  materials = {
    " " = "minecraft:air"
    "r" = "minecraft:red_wool"
    "o" = "minecraft:orange_wool"
    "y" = "minecraft:yellow_wool"
    "g" = "minecraft:lime_wool"
    "l" = "minecraft:light_blue_wool"
    "b" = "minecraft:blue_wool"
    "p" = "minecraft:purple_wool"
  }
}
I settled on using these eight types of blocks. The air block type is important since this signifies “nothing”. Perhaps we could skip these air blocks to increase the performance a bit, but if you build the structure where there are already other blocks you will want to have the air blocks as well.
I will use a variable for the starting coordinate (the origin) representing the lower left corner of the structure in the (x,y,z) space:
variable "origin" {
  type = string

  validation {
    condition     = length(split(",", var.origin)) == 3
    error_message = "Specify three coordinates x,y,z"
  }
}
The coordinate should be supplied as e.g. 1,2,3. Remember that the structure I create will be placed in the (x,y) plane, i.e. with a fixed z-coordinate.
I let the origin be the lower left corner because it is easier to walk around and find a good lower left corner coordinate in the Minecraft world, but I need to convert this coordinate to the upper left corner coordinate because the input image is defined starting in this corner. I do this by adjusting the y coordinate up by the height of the structure, here represented by the number of lines in the input data:
locals {
  # split the input origin coordinate into pieces
  # also convert to numbers, but we will need to redo this later
  start = [for c in split(",", var.origin) : tonumber(c)]

  # read the input data for the structure
  data  = file("${path.module}/input.txt")

  # split the data into lines
  lines = split("\n", local.data)

  # recalculate the new origin (upper left corner)
  origin = [
    local.start[0],
    local.start[1] + length(local.lines),
    local.start[2],
  ]
}
What is left to do is to go through each line and each character in the line and compute its coordinate. The following calculation produces one list of coordinates on the form <material>,x,y,z:
locals {
  coordinates = compact(flatten([
    for i in range(length(local.lines)) : [
      for j in range(length(local.lines[i])) : "${substr(local.lines[i], j, 1)},${local.origin[0] + j},${local.origin[1] - i},${local.origin[2]}"
    ]
  ]))
}
The x-coordinate increases with the j loop index, and the y-coordinate decreases with the i loop index (because we start at the upper left corner and work our way down to the lower right corner).
To produce the blocks in the Minecraft world I use the minecraft_block resource type with a for_each going through all the coordinates:
resource "minecraft_block" "all" {
  for_each = toset(local.coordinates)

  material = local.materials[split(",", each.value)[0]]

  position = {
    x = tonumber(split(",", each.value)[1])
    y = tonumber(split(",", each.value)[2])
    z = tonumber(split(",", each.value)[3])
  }
}
Testing it out#
To test the solution I have created the following larger Terraform logo using different colors of blocks:
bbb
bbbbbb
bbbbbbbbb
bbbbbbbbbbbb
pbbbbbbbbbbbbbl
ppbbbbbbbbbbbbblll
pppbbbbbbbbbbbbblllll
ppppbbbbbbbbbbbbbllllllll
pppppbbbbbbbbbbbbbllllllll
ppppppbbbbbbbbbbbbblllllll  lll                                                   rr
pppppppbbbbbbbbbbbbbllllll  lllllg                                             rrrrr
ppppppppbbbbbbbbbbbbblllll  llllllggg                                      rrrrrrrrr
pppppppppbbbbbbbbbbbbbllll  lllllllggggg                                oorrrrrrrrrr
ppppppppppbbbbbbbbbbbbblll  llllllllggggggg                          oooooorrrrrrrrr
pppppppppppbbbbbbbbbbbbbll  lllllllllgggggggggg                   oooooooooorrrrrrrr
ppppppppppppbbbbbbbbbbbbbl  llllllllllgggggggggggg             yooooooooooooorrrrrrr
pppppppppppppbbbbbbbbbbbbb  lllllllllllgggggggggggggy       yyyyyooooooooooooorrrrrr
   pppppppppppbbbbbbbbbbbb  llllllllllllgggggggggggggyy   yyyyyyyyooooooooooooorrrrr
      pppppppppbbbbbbbbbbb  lllllllllllllgggggggggggggy   yyyyyyyyyooooooooooooorrrr
         pppppppbbbbbbbbbb  blllllllllllllggggggggggggg   yyyyyyyyyyooooooooooooorrr
            pppppbbbbbbbbb  bblllllllllllllgggggggggggg   yyyyyyyyyyyooooooooooooorr
               pppbbbbbbbb  bbblllllllllllllggggggggggg   yyyyyyyyyyyyooooooooooooor
                  pbbbbbbb  bbbblllllllllllllgggggggggg   yyyyyyyyyyyyyooooooooooooo
                     bbbbb  bbbbblllllllllllllggggggggg   gyyyyyyyyyyyyyoooooooooooo
                         b  bbbbbblllllllllllllgggggggg   ggyyyyyyyyyyyyyooooooooooo
                            bbbbbbblllllllllllllggggggg   gggyyyyyyyyyyyyyoooooooooo
                               bbbbblllllllllllllgggggg   ggggyyyyyyyyyyyyyooooooo
                            bb    bbblllllllllllllggggg   gggggyyyyyyyyyyyyyooo
                            bbbbb    blllllllllllllgggg   ggggggyyyyyyyyyyy
                            bbbbbbbb    llllllllllllggg   gggggggyyyyyyy
                            bbbbbbbbbbb    llllllllllgg   ggggggggyyy
                            bbbbbbbbbbbbbll    lllllllg   gggggggg
                            pbbbbbbbbbbbbbllll    lllll   ggggg
                            ppbbbbbbbbbbbbbllllll    ll   gg
                            pppbbbbbbbbbbbbbllllllll
                            ppppbbbbbbbbbbbbbllllllllll
                            pppppbbbbbbbbbbbbblllllllll
                            ppppppbbbbbbbbbbbbbllllllll
                            pppppppbbbbbbbbbbbbblllllll
                            ppppppppbbbbbbbbbbbbbllllll
                            pppppppppbbbbbbbbbbbbblllll
                            ppppppppppbbbbbbbbbbbbbllll
                            pppppppppppbbbbbbbbbbbbblll
                            ppppppppppppbbbbbbbbbbbbbll
                              pppppppppppbbbbbbbbbbbbbl
                                 pppppppppbbbbbbbbbbbbb
                                    pppppppbbbbbbbbbbbb
                                       pppppbbbbbbbbbbb
                                           ppbbbbbbbbbb
                                              bbbbbbbbb
                                                 bbbbbb
                                                    bbb
Placing this content in input.txt, configuring input values to all my variables, and running terraform apply produces the following structure in my Minecraft world:
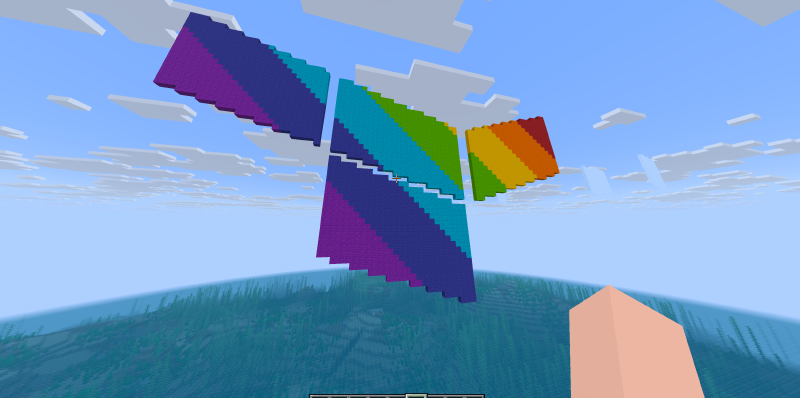
This was pretty successful!
Conclusions and future work#
This post has shown a simple way to produce 2D structures in the Minecraft world using Terraform.
I believe you can extend this idea to 3D structures, but you need to come up with a convenient way of defining such structures in a text file. If you are reading this and feel up for the challenge: let me know what you come up with!
I’ll throw one idea out right now: you could define your 3D structures layer by layer in the (x,z)-plane. This could become quite complex and produce large input files. However, I do not think it is possible to get around this fact. With that said, maybe there is a way to mathematically describe the structure you want to create using a simple formula? This would be very concise, but would of course put severe limits on what you can create.